Getting started with OpenPGP on Thunderbird 115.13.0
2 posts in a row! I can’t believe it!
Overview
For some reason, Thunderbird decides to change key workflows every few months that make any previous instruction on the matter completely pointless and even convoluting the entire process. I’m aware even this guide will be outdated within months but I’ll make one anyways just because. The version of Thunderbird I am using is the latest for Linux Mint 21.3 as of the date posted.
Step 0
You first need to have some email account imported into Thunderbird. There are tons of articles exaplining this and its otherwise quite intuitive, so I’ll skip it.
Step 1: Open OpenPGP Menu
You first need to generate your PGP keys. This is assuming you don’t already have PGP keys associated with your account. Remember, this is a getting started guide, in which case you would have to import them using a similar but not covered process.

Open the hamburger menu in the top right corner of the application, and then go Tools

Then select “OpenPGP Key Manager”. This should open up a new menu (which I won’t show since it’s populated with some personal contacts).
Step 2: Generate Keys
In the toolbar for the new menu, select “Generate -> New Pair”. From there the defaults should be fine, just make sure that the “Identity” email address is the one you want. You will have to generate a new key for each email account you want to send encrypted email on.
Once you are done, there will be an entry in your OpenPGP Key Manager window for the key you just created.
Step 3: Set key to active encryption key
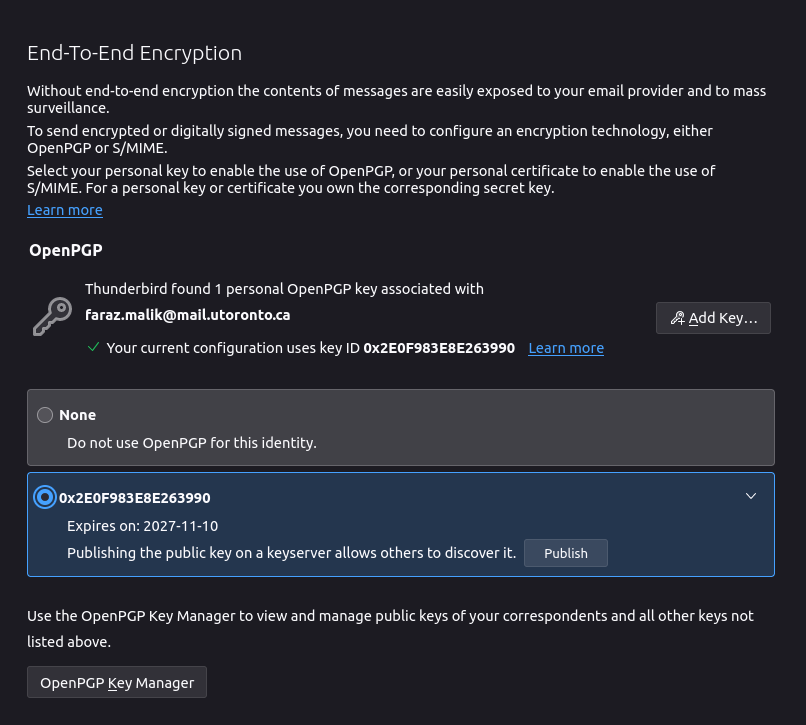
Go to your accounts settings page. For me this is the gear on the bottom left corner of the window and then the option saying “Account Settings” still on the bottom left. Find the email address you just generated in the list on the left, and go to the entry saying “End-to-End Encryption” underneath it.

From there, like shown above, select the second option (the one with numbers) and you will see a checkmark, which means you’re done! You can publish your key by pressing the relevant button, but make sure you’re using a computer you actually own since the key is stored on your actual machine. Basically, if you’re at a library or on a school computer, you stop here and do this on a computer your own!
That’s it so far. To actually send an email you would need to import someone else’s key from either a keyserver or a file, but I’ll leave that part for another time.
For site maintenance, I’ve added an RSS feed and will add my own PGP key soon.